

搜索到
29
篇与
docker
的结果
-
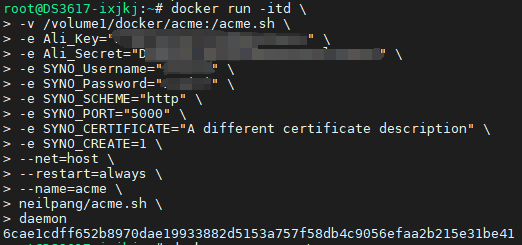
 适用于群晖7.x 自动续期证书-docker版 {collapse}{collapse-item label="最新方法" open}2024-08-23 一、ssh下root账户操作docker run -itd \ -v /volume1/docker/acme:/acme.sh \ -e Ali_Key="LT1234P9a3z" \ -e Ali_Secret="1323iP1pYh1231l41231a7" \ -e SYNO_Username="xxxxx" \ -e SYNO_Password="xxxxx" \ -e SYNO_SCHEME="http" \ -e SYNO_PORT="5000" \ -e SYNO_CERTIFICATE="A different certificate description" \ -e SYNO_CREATE=1 \ --net=host \ --restart=always \ --name=acme \ neilpang/acme.sh \ daemon 二、更改ca为letsencryptdocker exec acme acme.sh --set-default-ca --server letsencrypt 三、重启容器 四、申请证书docker exec acme \ acme.sh --issue \ -d examples.com -d *.examples.com \ --dns dns_ali \运行一次此命令添加为群辉系统证书docker exec acme \ acme.sh --issue \ -d XXXXXX.cn -d *.XXXXXXX.cn \ --dns dns_ali \ --deploy --deploy-hook synology_dsm 五、加入任务计划,每月运行一次docker exec acme \ acme.sh --issue \ -d XXXXXX.cn -d *.XXXXXXX.cn \ --dns dns_ali \ --deploy --deploy-hook synology_dsm{lamp/}{/collapse-item}{collapse-item label="方法一"}一、ssh下root账户操作docker run -itd \ -v /volume1/docker/acme:/acme.sh \ -e Ali_Key="LTA1GGS87ljy7YnYy5yBvZ" \ -e Ali_Secret="QU1MQAQQQQQQQQQQQwPY8oF" \ -e SYNO_Username="XXXXXX" \ -e SYNO_Password="XXXXXXXXXX" \ -e SYNO_Certificate="" \ --net=host \ --restart=always \ --name=acme \ neilpang/acme.sh \ daemon二、更改ca为letsencryptdocker exec acme acme.sh --set-default-ca --server letsencrypt三、重启容器四、申请证书docker exec acme \ acme.sh --issue \ -d examples.com -d *.examples.com \ --dns dns_ali \运行一次此命令五、加入任务计划,每月运行一次docker exec acme \ acme.sh --issue \ -d XXXXXX.cn -d *.XXXXXXX.cn \ --dns dns_ali \ --deploy --deploy-hook synology_dsm{lamp/}{/collapse-item}{collapse-item label="方法二"}一、安装docker容器docker run --rm -itd \ -v /volume1/docker/acme:/acme.sh \ #冒号前是本地目录,自行更换 --net=host \ #这是网络配置,勿动 --name=acme \ #这是容器名称,可自行更改(后面都需要用容器名称) neilpang/acme.sh daemon二、保持容器更新(容器名称均为【acme】,请自行替换)docker exec acme --upgrade --auto-upgrade三、群晖找到本地文件“account.conf”(在第一步骤中的第二行映射的目录下)export Ali_Key="***" #这是阿里云的key export Ali_Secret="***" #这是阿里云的密钥 export SYNO_USERNAME='***' #群晖新建用户,用户部署 export SYNO_PASSWORD='***' #群晖用户密码,用于部署 export SYNO_SCHEME="http" #部署状态 export SYNO_PORT="5000" #群晖登陆端口 export SYNO_CERTIFICATE="A different certificate description" export SYNO_CREATE=1四、生成证书在dockerdocker exec acme acme.sh --issue --force --dns dns_ali -d 域名一 -d 域名二验证是否生成成功代码docker exec acme --info -d 域名一五:部署证书在群晖nasdocker exec acme --deploy -d 域名一 --deploy-hook synology_dsm --home /acme.sh六:群晖计划任务本地创建一个sh文件例如【acme.sh】文件内容如下docker exec acme --cron --force --home "/root/.acme.sh" --config-home "/acme.sh" docker exec acme --deploy -d 域名一 --deploy-hook synology_dsm --home /acme.sh docker exec acme --deploy -d 域名二 --deploy-hook synology_dsm --home /acme.shbash /volume1/docker/acme/a.sh >> /volume1/docker/acme/log.txt 2>&1{/collapse-item}{/collapse}{lamp/}原文链接:https://blog.csdn.net/weixin_42279526/article/details/138734671
 -
docker容器怎么设置开机启动或停止 一、设置docker开机启动查看已启动的服务systemctl list-units --type=service查看是否设置开机启动systemctl list-unit-files | grep enable设置开机启动systemctl enable docker.service关闭开机启动systemctl disable docker.service二、docker容器设置自动启动启动时加--restart=alwaysdocker run --restart=always参数解释参考:https://docs.docker.com/engine/reference/run/#restart-policies—restart{lamp/}Docker容器的重启策略如下:no,默认策略,在容器退出时不重启容器on-failure,在容器非正常退出时(退出状态非0),才会重启容器on-failure:3,在容器非正常退出时重启容器,最多重启3次always,在容器退出时总是重启容器unless-stopped,在容器退出时总是重启容器,但是不考虑在Docker守护进程启动时就已经停止了的容器————————————————如果已经启动的项目,则使用update更新:docker update --restart=always <容器id>docker update --restart=no <容器id>
-
群晖docker上搭建ChatGPT演示网页 参考的https://www.ai2news.com/blog/2677812/https://github.com/Kerwin1202/chatgpt-web#docker-build--run还未测试能否行得通docker run -d \ --restart unless-stopped \ --name chatgpt-web \ -p 3002:3002 \ -e HTTP_PROXY="http://192.168.0.xxx:xxx" \ -e OPENAI_ACCESS_TOKEN=<your_accessToken> \ chenzhaoyu94/chatgpt-web:latest
-
Unraid定时启动和停止docker容器 使用User Scripts插件点击“ADD NEW SCRIPT”新建脚本,名字随便取。我这里建了启动和停止两个。执行时间选择“Custom”创建自定义时间,后面再加入时间参数主要参数是5个 ,每个 就是一个参数,用空格隔开,分别从左到右:分钟,小时,天,月,周比如 50 11 * * 1 意思就是,每周一,11:50执行创建好后,点左侧设置齿轮,点击“EDIT SCRIPT”编辑脚本比如我要启动docker中的webdav容器/usr/bin/docker start webdav停止则是/usr/bin/docker stop webdav分两个脚本执行。输好后点“SAVE CHANGES”保存设置。点击“APPLY”应用。
-
docker常用命令 {collapse}{collapse-item label="安装docker" open}安装dockerDocker官方为了简化安装流程,提供了一套安装脚本,Ubuntu 和 Debian 系统可 以使用这套脚本安装:curl -sSL https://get.docker.com/ | sh安装portainer面板#拉取 docker pull portainer/portainer #安装 docker run -p 9000:9000 -p 8000:8000 --name portainer \ --restart=always \ -v /var/run/docker.sock:/var/run/docker.sock \ -v /mnt/appdata/portainer/data:/data \ -d portainer/portainer{/collapse-item}{collapse-item label="停止和启动"}docker停止并删除(docker停止容器命令)(1)停止一个已经运行的容器可以使用以下命令:docker stop [CONTAINER ID/NAME]其中[CONTAINER ID/NAME]为需要停止容器的ID或名称。(2)删除一个已经停止的容器可以使用以下命令:docker rm [CONTAINER ID/NAME]其中[CONTAINER ID/NAME]为需要删除容器的ID或名称。(3)如果需要同时停止并删除一个容器,可以使用以下命令:docker rm -f [CONTAINER ID/NAME]其中-f表示强制删除容器,即使容器正在运行。{/collapse-item}{collapse-item label="容器内的文件编辑"}docker内的文件为什么不能直接编辑通常是因为在默认情况下Docker容器启动后,容器内的文件系统是以只读方式挂载的。这是为了保证容器的可移植性和隔离性,防止容器内的更改影响到宿主机或其他容器,造成不必要的麻烦和困扰。(既是优点也是缺点)分享修改方法方法1:复制容器当前状态:容器已处于启动状态操作位置:在宿主机上操作将容器内的文件复制到外面来,修改后,再复制进去。(注:复制进去后重启容器,不然不生效,就尴尬)# 复制本地文件到容器(注:查看当前路径位置) docker cp 文件名 容器ID:/路径/test.txt #容器外操作 # 复制容器内指定的文件到本地当前位置 docker cp 容器ID:/路径/test.txt ./文件名 #容器外操作 方法2:挂载(推荐使用)容器当前状态:容器处于未启动状态操作位置:在宿主机上操作需要在运行之前就做好各种准备# 创建一个运行的nginx,为下步复制文件到本地做准备 #步骤1: docker run --name nginx-80 -p 80:80 -d nginx # 复制nginx的配置目录到本地 #步骤2: docker cp nginx-80:/etc/nginx/ /MyDockerData/nginx/conf/ Successfully copied 3.58kB to /MyDockerData/nginx/conf/cond.d # 复制nginx的日志到本地 #步骤3: docker cp nginx-80:/var/log/nginx /MyDockerData/nginx/log Successfully copied 2.56kB to /MyDockerData/nginx/log # 复制网站目录到本地 #步骤4: docker cp nginx:/usr/share/nginx/html /MyDockerData/nginx/html Successfully copied 1.54kB to /MyDockerData/nginx/html # 运行容器并挂载目录。格式:<-p 端口映射><-v 路径映射> 实例:docker run --name nginx -p 80:80 -v $HOME/本地路径:内部路径 -v $HOME/本地路径:内部路径 -d nginx #步骤5: docker run --name nginx-8888 \ -p 8888:80 \ -v /MyDockerData/nginx/html:/usr/share/nginx/html \ -v /MyDockerData/nginx/conf:/etc/nginx \ -v /MyDockerData/nginx/log:/var/log/nginx \ -d nginx 方法3:vim容器当前状态:容器处于运行状态,有网络操作位置:在容器中操作进入到容器内,安装编辑工具# ubuntu操作系统安装方式(要有网) apt install vim # centos系统安装方式(要有网) yum install vim 方法4:echo容器当前状态:容器处于运行状态,无网络操作位置:在容器中操作如果会使用linux三剑客,就会更便捷# 向文件中插入文字 echo "hello world" >> ceshi.txt # 替换文本中的字符串: sed 's/books/BOOKS/' ./test.php # 直接编辑文件 选项-i ,会匹配 file 文件中每一行的所有 book 替换为 books: sed -i 's/book/books/g' 文件名称 {/collapse-item}{collapse-item label="折叠标题二"} 折叠内容二{/collapse-item}{/collapse}